FAQ
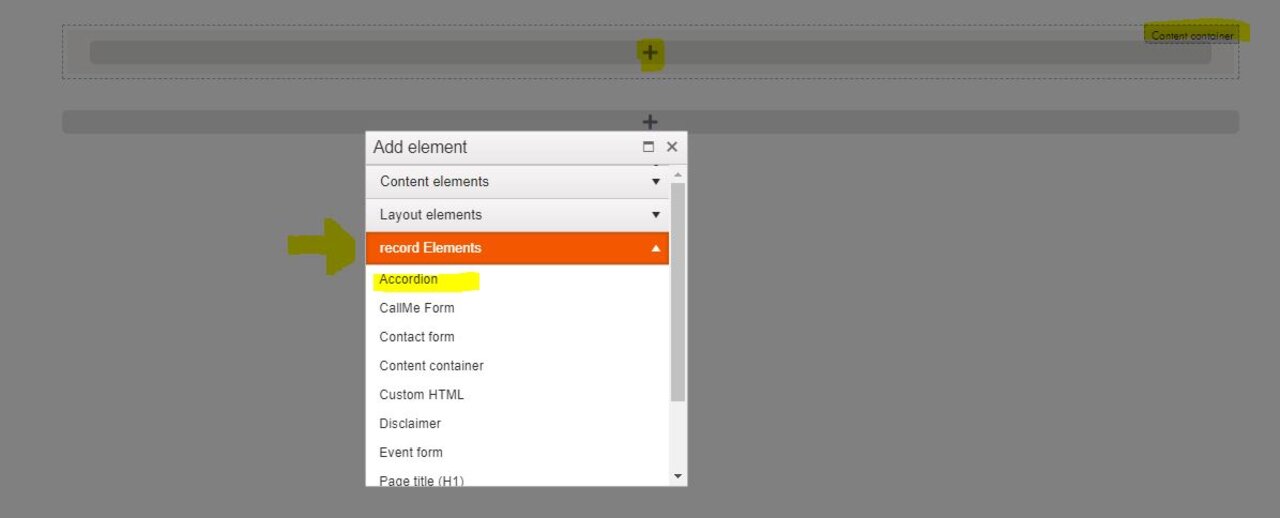
If you have a lot of content on one page and want to make this leaner and clearer, use the accordian option.
Create a new page, select under "record elements" Accordion, and add as many new sections as you need.
The result looks similar as what you can see in this FAQ section.
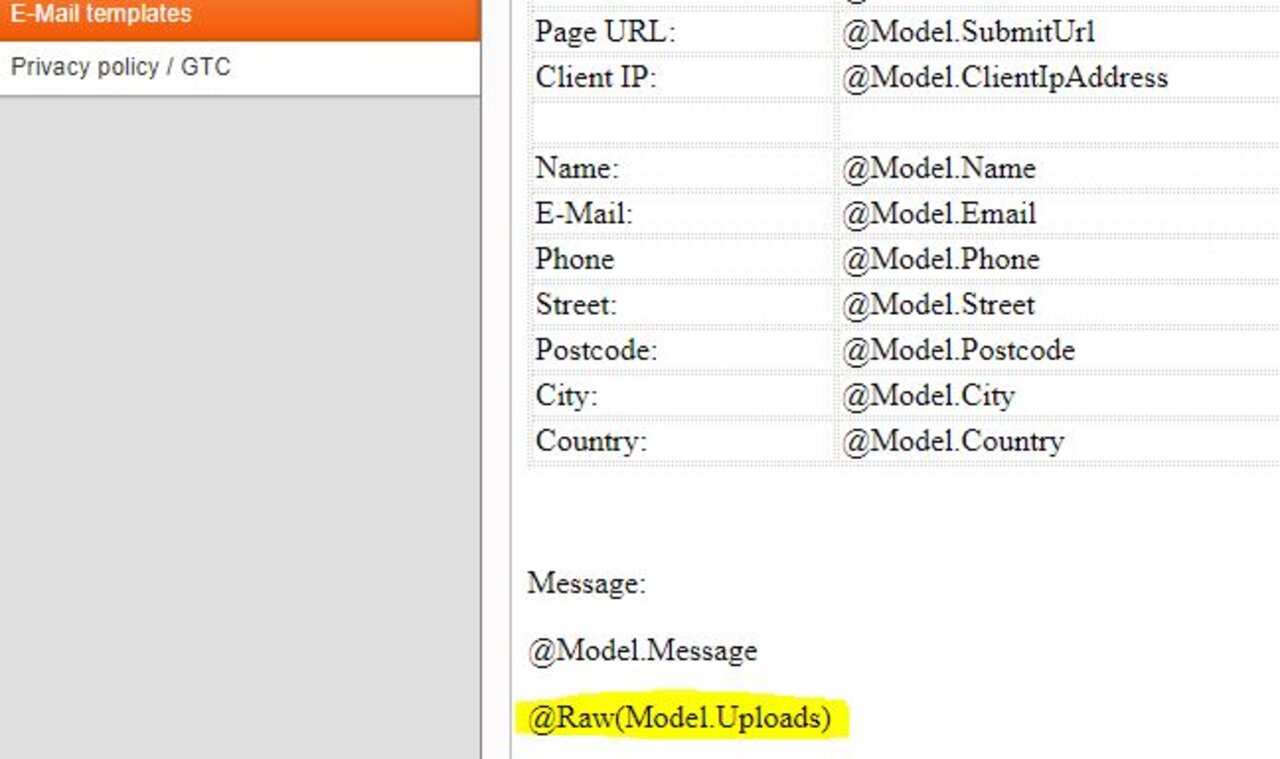
How to adapt the settings in the contact form
- Go to Master data / E-Mail templates / CONTACT_FORM
- If a contact form with attachments is created, the following placeholder must be entered in the template (e-mail templates > CONTACT_FORM) @Raw(Model.Uploads)
- Which fields are to be displayed and which are not you can define directly when creating the page
For a flexible lenght of the columns you can activate the "Masonry Layout" in the Multicolumn-list. Just try it.
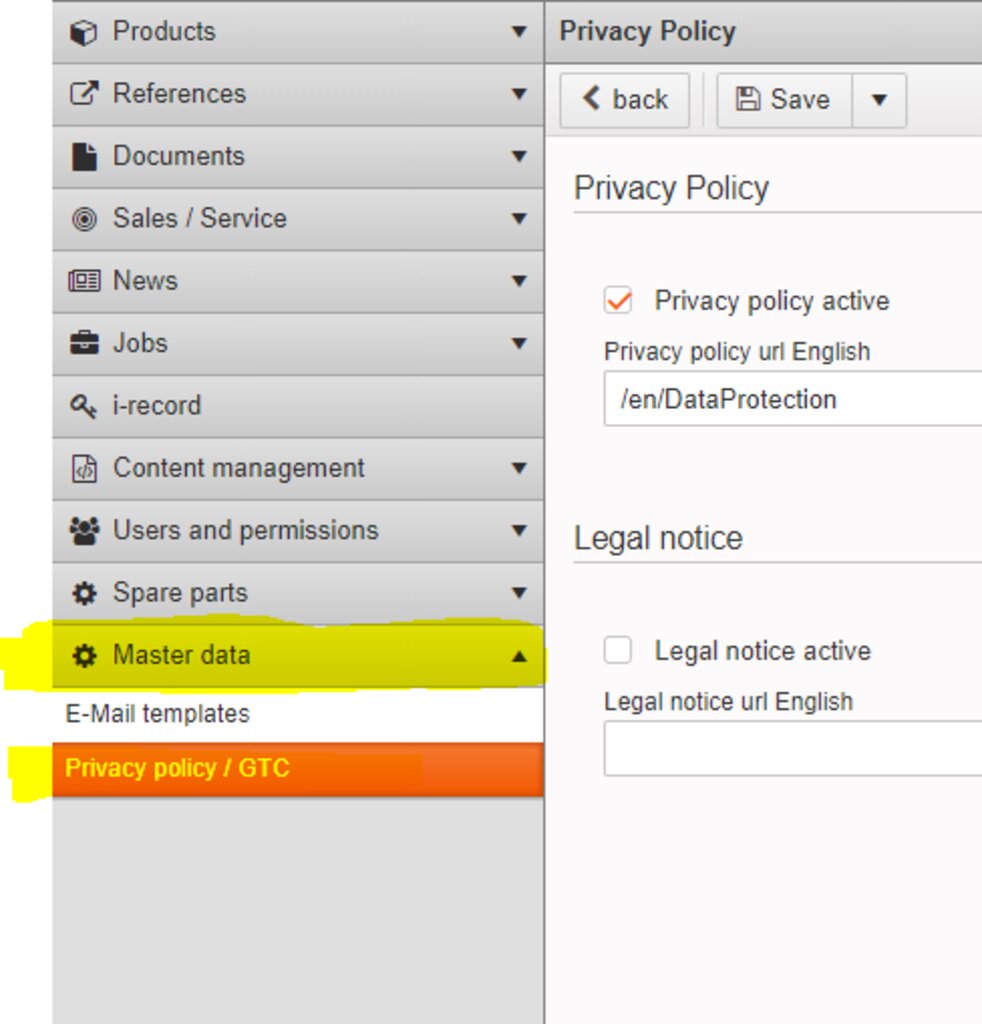
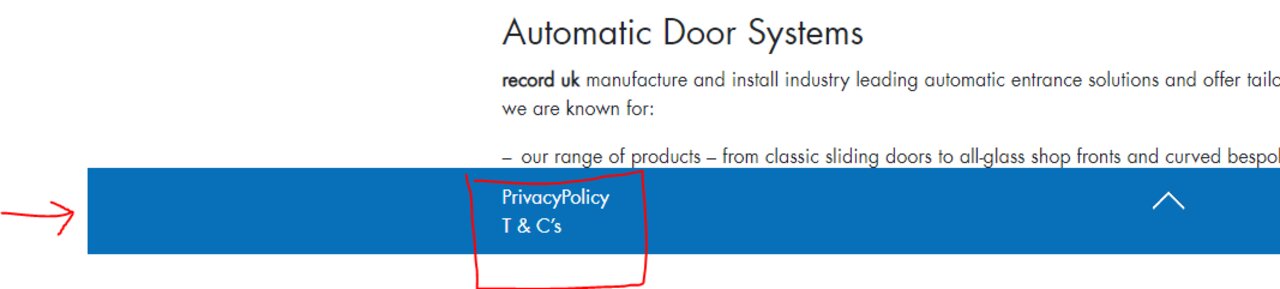
Direct Link from footer to Privacy Policy / General Terms and Conditions / Legal notice:
You can now directly link from your footer to those pages. Select Master data / Privacy Policy / GTC
Prepare first the page, then tick the checkbox and add the path in the Master data
The Main-Navigation should look the same no matter which country website a customer is visiting.
Please do not change the order or the content categories in the Main-Navigation. A uniform appearance simplifies the use of the website for the visitor and enables us to compare (analyze) the different pages.
Please also check the the FAQ about Sub-Navigation.
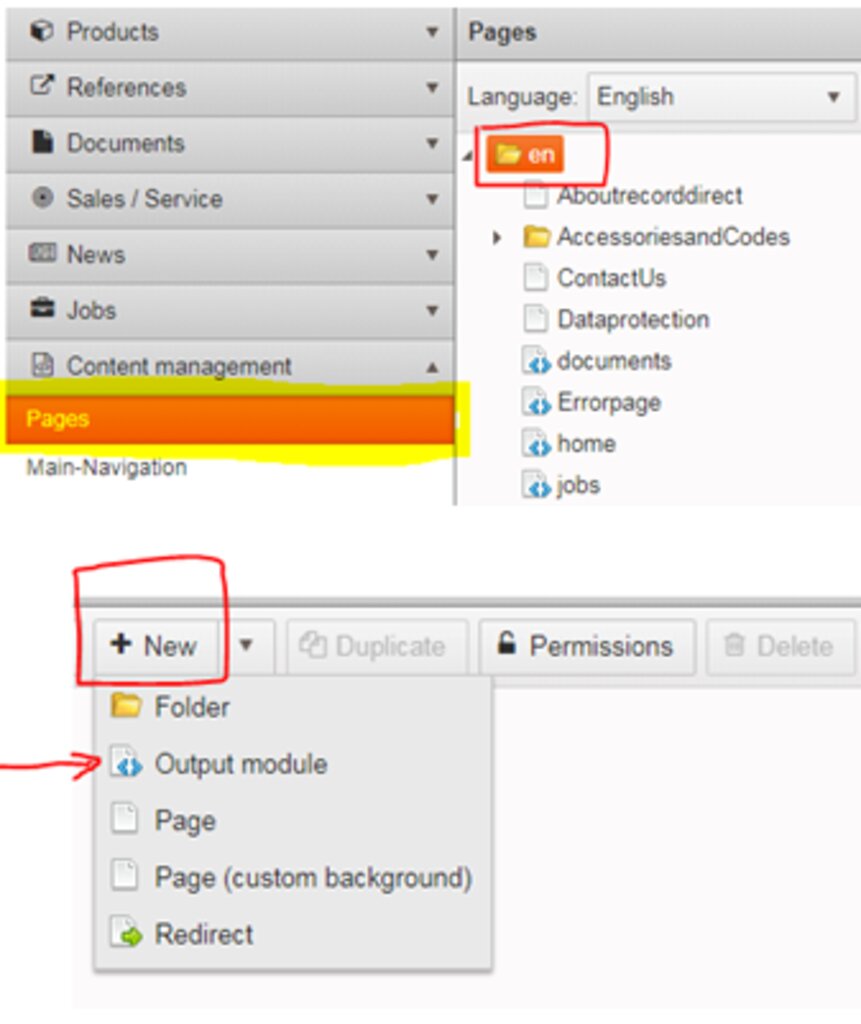
When do you use a module page?
Whenever there is a module page suitable to your topic, take it!
- A module page contains a predefined logic (e.g. for the U-value calculator, news, jobs, error page 404 etc.)
- The CMS is implemented in a way that each Output module can only be used 1 time per organization. If activated it does not appear in the Output module list anymore.
- Background images cannot be defined in module pages. An exception is the start page. Module pages cannot be duplicated.
> Check if you have activated all module pages: Pages / main folder / +New / Output module
my.record functionalities
Easily share files with customers
my.record is a useful tool which allows you to collect any of the pages of content available in ‘Documents’, ‘References’ and ‘Sales’ in one place.
- Click the ‘note’ option at the bottom of any page you are interested in and it will be saved in your ‘my.record’ section. You can define as many lists as you need. Remark: Updated documents are automatically updated in your ‘my.record list’ too. That makes it comfortable to work with your once defined lists, independent if they are product-specific or customer-oriented.
- The ‘share’ option is the tool for a quick link dispatch. Select the file and share the document directly by adding yours and the recipients E-Mail address and evtl. a message. Or activate the link and copy it into your email/outlook system.
- Try it – you will like it! Please tell and explain to your colleagues.
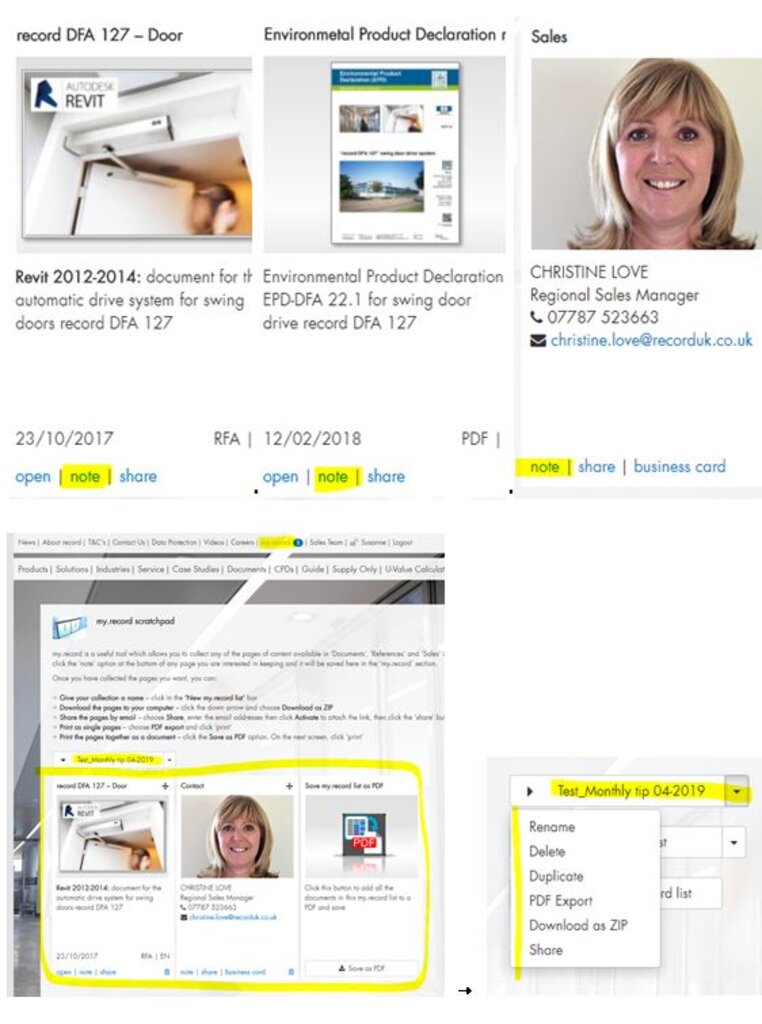
Since September 2020 all links that you share out of my.record are time-unlimited links. They do not expire anymore.
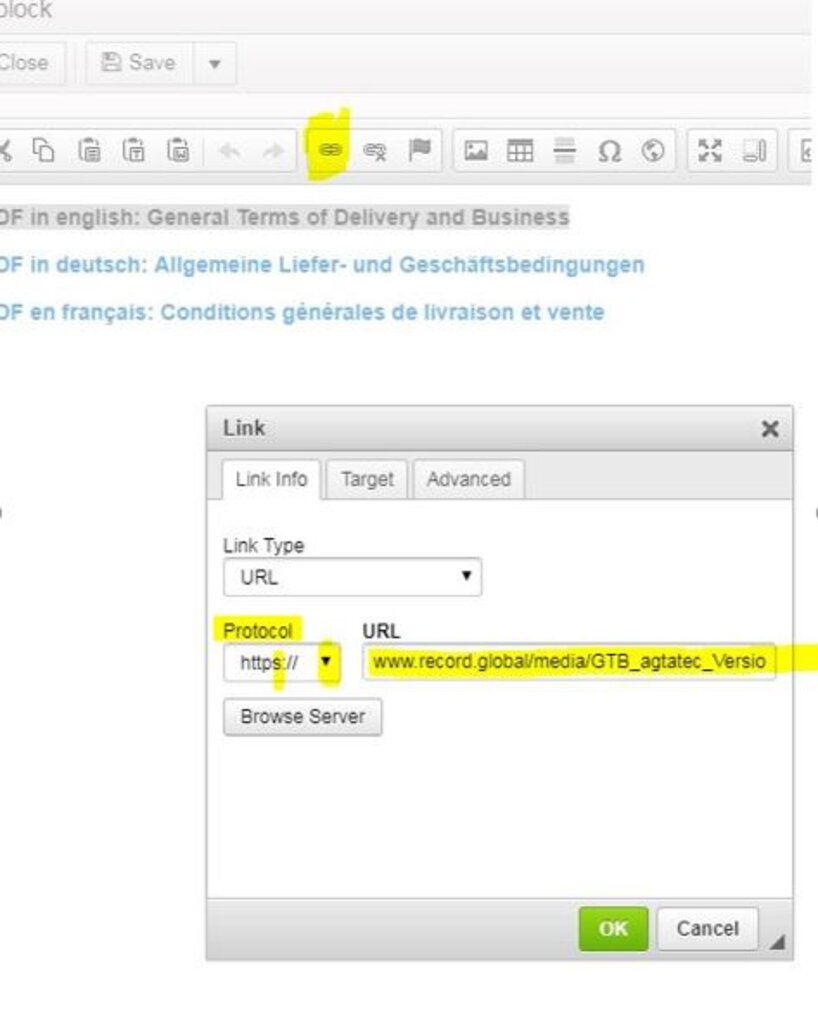
How can you link to a pdf outside the document section?
- Upload your pdf in the media section:
Content management / Media / +Upload
Attention: no spaces and no special characters in the file name!
You can copy the url here and then paste instead of adding it manually as explained in the next step - Go to the page where you want to add the link > edit content
Click on the «chain» and add the url manually, as you can not access the media section directly
url: your country url > (sample: www.record.global)
followed by /media/ > filename incl. ".pdf" at the end - Change Protocol into https://
The dimensions are:
Slider Entrance page: 2000 x 850 px
Product pictures overview: 510 x 375 px
Product pictures detail page: 540 x 340 px
Teaserboxes: 230 x 170 px
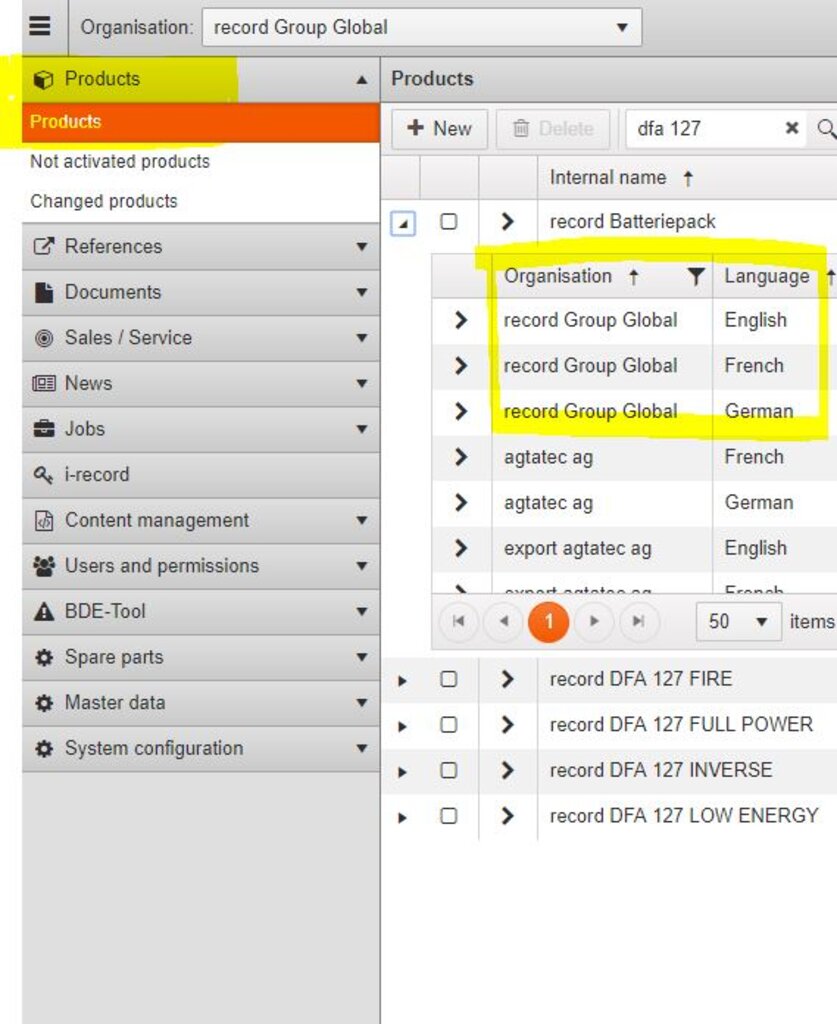
What is the difference between global and local product pages?
- Global products are administered by record global in 3 languages (English, German, French).
- The subsidiary can either adapt the global products/languages without any changes or modify it. Local images and/or videos can also be added. The sequence is programmed as follows:
- Photos local
- Photos global
- Videos local
- Videos global - The global images and videos are not visible to the subsidiary in the backend CMS
- Attention: Local products cannot be assigned to global documents. Furthermore, we recommend that no local products should be assigned in parallel to the global products with the same name, such as STA 20 as an example.
You can sort different elements such as teaser boxes, products, news etc. within a multicolumn-list. Activate the User defined element and click on the cross cursor to move them around.
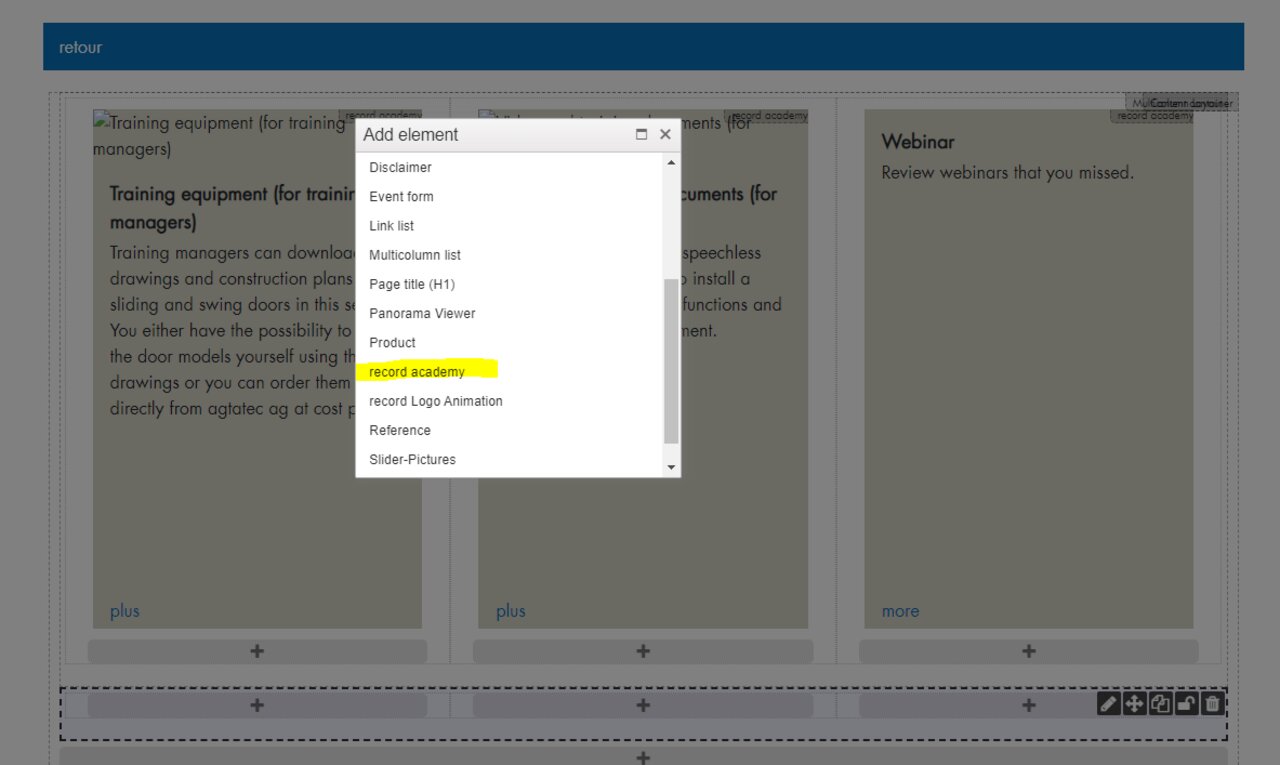
The module is now implemented as output module with content container as you know it from other pages.
- Layout elements : Select the Multicolumn Layout and define the number of columns
- Record elements : Select record academy
You have the possibility to build your page with individual elements. E.g. separate the webinars from the videos.
For this reason there is a new document type « Academy Webinars ». Remember to enable the new document type "Academy Webinar" in the relevant security roles.
There is a pdf export button for an overview of all references on the upper right, between the filters and the first picture. This provides a compact overview of all referencies with one image per object.
Please be aware that it takes up to 6 hours to update the search functionality after having uploaded new documents. The relevant Build Fulltext Index runs every 6 hours.
You can add as many images as you like on your entrance page. Go to your home site >Pages/home/Properties/. There you can add and sort images the way you want them to appear.
Ho to add a link on the slider image:
You can add a link on the entrance page, if you use the title or description(subtitle) option. Go to >Pages/home/Properties/, click on slider images, add url. Just add your link in the predefined field.
You can also define the speed1) and order2) of your slider collection:
1) Go to Slide display duration and define the seconds
2) Select the image and move up or down according to your preference.
Picture size: Please remember the different image size which is 2000 x 850 px (> FAQ / Pictures sizes)
For top of column add value from "mt-1" to "mt-5" in Cell Row below Custom CSS classes
For bottom of column add value from "mb-1" to "mb-5" in Cell Row below Custom CSS classes
Order in Sub-Navigation (burger menu): You are free to sort the links in the Sub-Naviagtion however it fits best. You can also create submenus within one Link by pulling the link into another link (+)
Please also check the the FAQ about Main-Navigation.
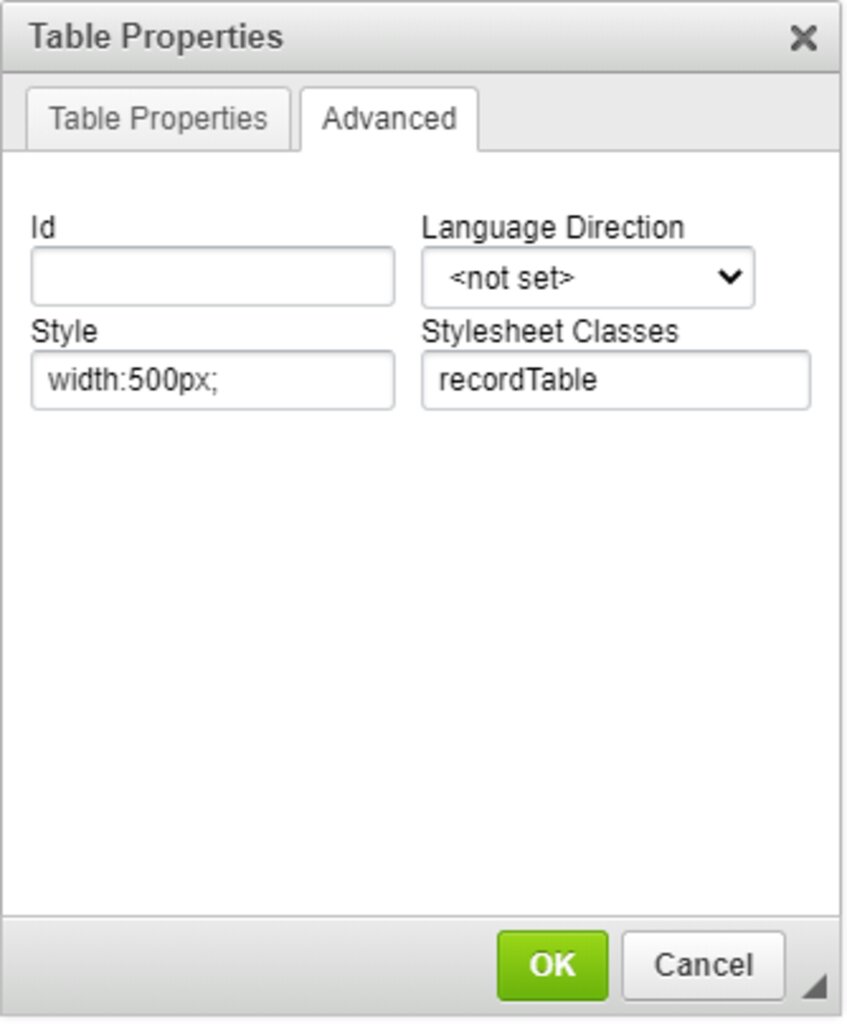
For tables use the pre-programmed Stylesheet Classes.
Go to > Table Properties/Advanced/Stylesheet Classes. Enter one of the following:
- recordTable zebra (for tables with color changing lines with taupe)
- recordTable (for white tables with predefined distances to the text)
Further formatting: right mouse click in cell
Via table properties and/or cell properties the table can be formatted as desired; width, height, alignment, background colour etc.
Security roles
- 3 Security roles (Sysadmin, Public, User) are defined by global when you start with your local website.
- Each organization can create its own user groups and define different authorizations assigned to the user groups. User administration is controlled by the web administrator.
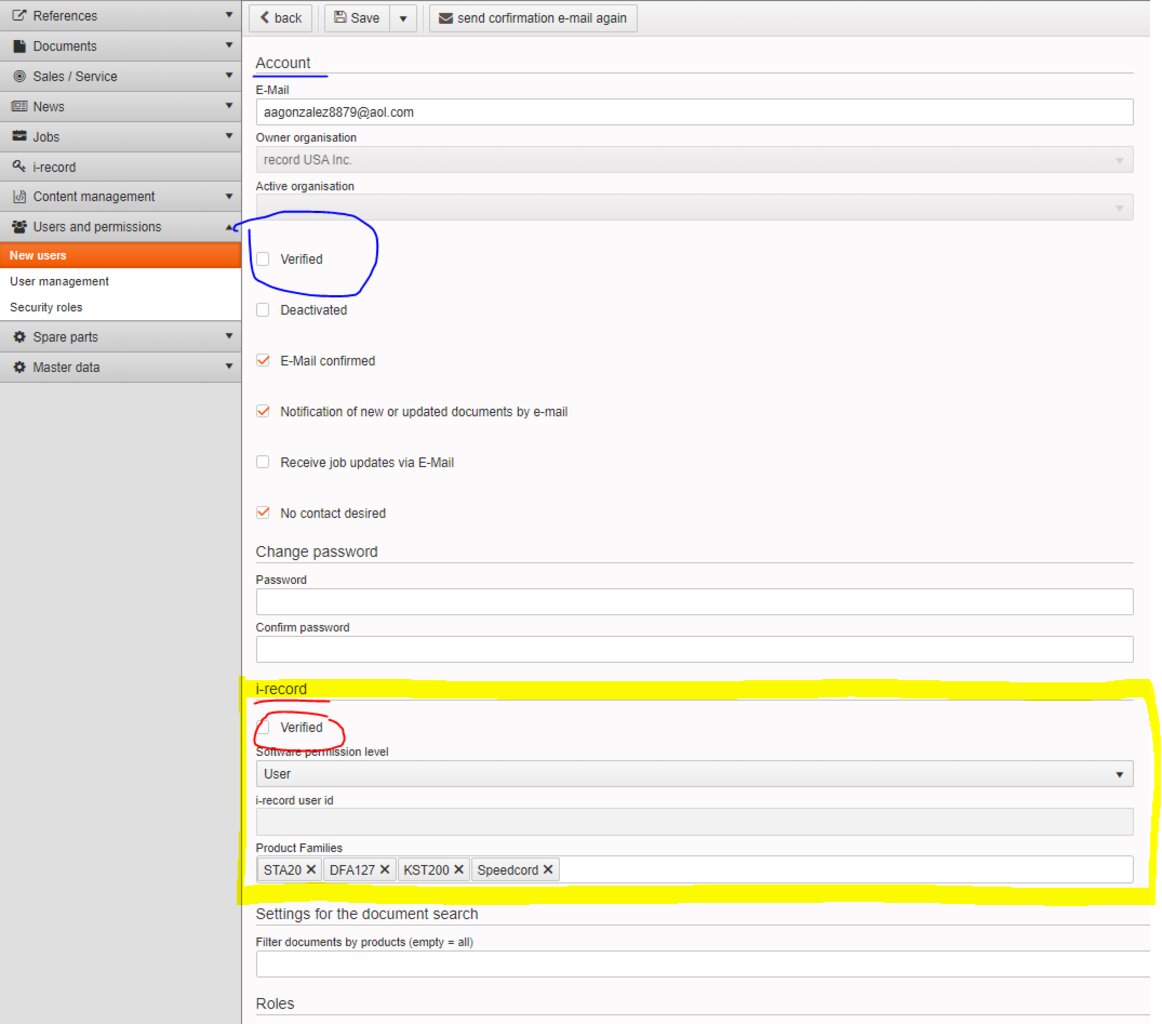
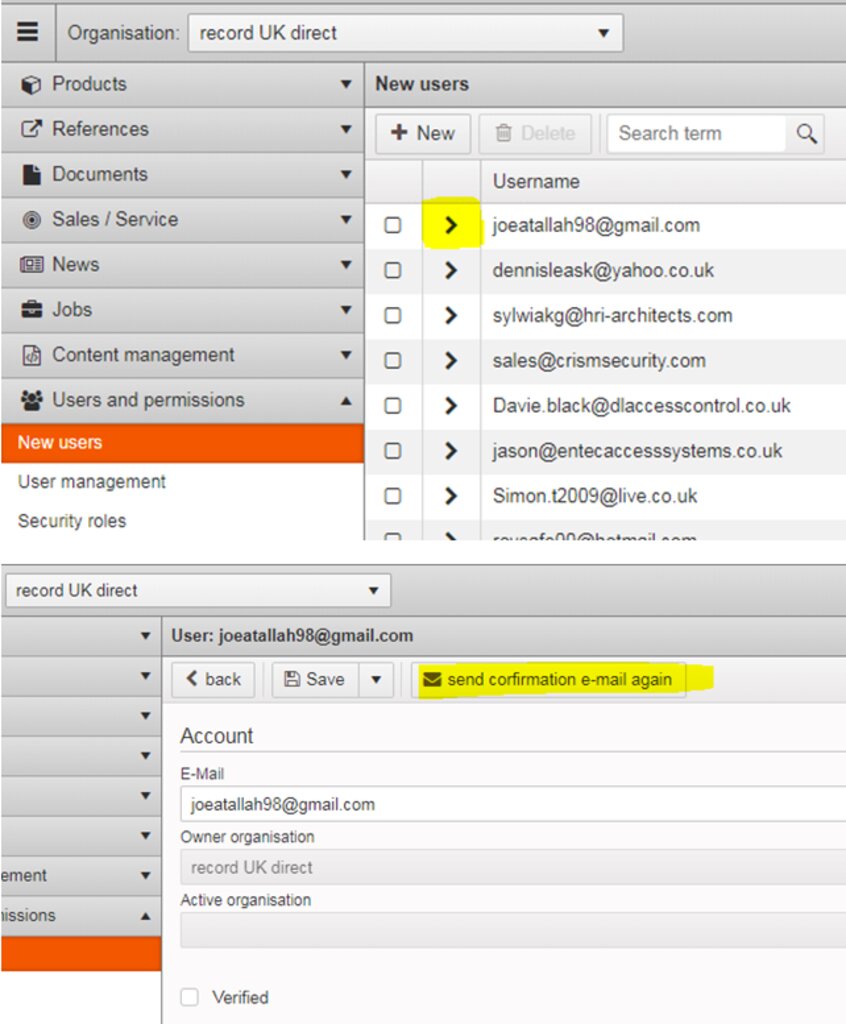
New users
- If a new user does not click on the verification link after registration, after 3 days an automated email is going out again.
The webmaster has the possibility to send the confirmation mail again. Click on new users, select e-mail account > send confirmation e-mail again.
If helpful you could complete contact details in a new account.
- Verification process new users: Since we started with i-record in some countries, there is a new section on i-record in the CMS backend.
This section is only relevant for i-record users and can otherwise be ignored. As a webmaster, you continue to verify your new users by clicking the checkbox at the top of the account (printshot below).